For yoga lovers, a mat is an essential companion, providing traction, cushioning, and a hygienic surface to practice asanas.
However, the humid and moist environment often found in yoga studios or homes can lead to an unwelcome guest – mold.
If left unchecked, mold can not only damage your mat but also pose health risks.
As you flow through your asanas, beads of sweat trickle down, seeping into the mat’s fibers, creating an ideal habitat for mold spores to germinate and proliferate.
The warm, damp conditions become a petri dish for their growth, leading to unsightly discoloration, musty odors, and potential respiratory issues.
Neglecting to address this issue can quickly turn your cherished yoga mat into an unsanitary and hazardous surface, compromising the very essence of your practice – serenity, mindfulness, and well-being.
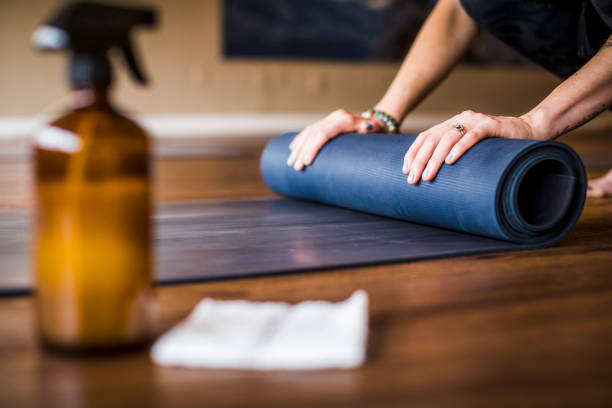
In this article, we’ll discuss how to remove mold from yoga mat and keep your practice space clean and refreshing.
But our journey doesn’t stop at removal; we’ll also shed light on preventive measures to keep your mat mold-free for years to come.
From proper storage and ventilation to regular cleaning routines and material selection, we’ll teach you how to maintain a clean practice space, fostering a harmonious and healthful yoga experience.
So join us as we learn how to remove mold from yoga mat and reclaim the serenity and purity that your practice deserves.
Understanding Mold Growth on Yoga Mats
Yoga mats, especially those made from natural materials like rubber or jute, provide an ideal breeding ground for mold.
Mold spores thrive in warm, damp environments and can quickly colonize on the mat’s surface.
Sweat, moisture from cleaning, and improper drying techniques can accelerate mold growth, leading to unsightly stains, musty odors, and potential health hazards.
Before diving into the cleaning process, it’s crucial to identify the type of mold you’re dealing with.
While most common household molds are relatively harmless, some varieties like black mold can cause serious respiratory issues and allergic reactions.
If you suspect a more serious mold infestation, it’s best to consult a professional for safe removal.
How to Inspect your Mat Thoroughly for Signs of Mold
Here’s a step-by-step guide on how to inspect your mat thoroughly for signs of mold:
1. Visual Inspection: Start by giving your mat a good look-over. Check for any visible signs of mold, such as black or greenish patches, on both the top and bottom surfaces.
2. Smell Test: Give your mat a sniff. Mold has a distinct musty smell, so if you notice an unpleasant odor, it could be a sign of mold growth.
3. Feel for Moisture: Touch your mat to see if it feels damp or wet. Mold thrives in moist environments, so if your mat is holding onto water, it’s a potential breeding ground for mold.
4. Check for Water Damage: Inspect your mat for any signs of water damage, such as discoloration, warping, or soft spots.
5. Look for Mold in Creases and Corners: Mold often grows in creases, corners, and other areas where moisture can accumulate. Make sure to inspect these areas closely.
6. Use a Flashlight: Shine a flashlight on your mat to look for any hidden signs of mold, such as tiny black spots or a thin, fuzzy layer.
7. Check the Edges and Backing: Inspect the edges and backing of your mat, as mold can grow in these areas too.
8. Take a Closer Look: If you suspect mold, take a closer look with a magnifying glass or a microscope to confirm the presence of mold spores.
Preparing for Mold Removal
Gather the following materials before starting the cleaning process:
- Gloves (rubber or nitrile)
- Face mask or respirator
- Goggles or safety glasses
- White vinegar or hydrogen peroxide
- Baking soda
- Tea tree oil or essential oils (optional)
- Soft-bristle brush or scrub pad
- Clean cloths or paper towels
- Vacuum cleaner with HEPA filter (optional)
Step 1: Ventilate the Area
Mold spores can easily become airborne during the cleaning process, potentially causing respiratory issues or spreading to other areas.
Open windows and doors to ensure proper ventilation, or consider moving the cleaning process outside if possible.
Step 2: Protect Yourself
Wear gloves, a face mask, and goggles to avoid direct contact with mold spores and cleaning solutions.
Mold exposure can trigger allergic reactions, respiratory problems, and skin irritations, so taking proper precautions is essential.
Step 3: Remove Loose Mold and Debris
Start by gently brushing or vacuuming the mat’s surface to remove any loose mold spores or debris.
If using a vacuum cleaner, ensure it has a HEPA filter to prevent the mold spores from being released back into the air.
Read More: How To Fix A Torn Yoga Mat
Effective Methods on How to Remove Mold from Yoga Mat
Once you’ve prepared the area and removed loose debris, it’s time to tackle the mold stains directly.
Here are some effective methods on how to remove mold from yoga mat that you should consider:
Method 1: Vinegar Solution
Vinegar is a natural and potent antimicrobial agent that can effectively kill mold and prevent its regrowth.
- Mix equal parts of white vinegar and water in a spray bottle.
- Generously spray the vinegar solution onto the moldy areas of the mat.
- Allow the solution to sit for at least 30 minutes to penetrate the mold.
- Use a soft-bristle brush or scrub pad to gently scrub the affected areas.
- Rinse the mat thoroughly with clean water and allow it to air dry completely.
Method 2: Hydrogen Peroxide
Hydrogen peroxide is another excellent natural disinfectant that can effectively remove mold from yoga mats.
- Pour undiluted hydrogen peroxide (3% solution) onto the moldy areas.
- Let it sit for 10-15 minutes to allow the peroxide to work its magic.
- Scrub the affected areas with a soft brush or scrub pad.
- Rinse the mat thoroughly with clean water and dry completely.
Method 3: Baking Soda and Essential Oils
For a gentle yet effective cleaning solution, combine baking soda and essential oils known for their antifungal properties.
- Mix 1 cup of baking soda with a few drops of tea tree oil or other essential oils like lemon or eucalyptus.
- Add enough water to create a thick paste.
- Apply the paste generously to the moldy areas of the mat.
- Let it sit for at least 30 minutes.
- Scrub the affected areas with a soft brush or scrub pad.
- Rinse the mat thoroughly with clean water and allow it to air dry completely.
Disinfecting, Deodorizing, and Drying the Yoga Mat
After removing the mold stains, it’s essential to disinfect and deodorize the mat to prevent future growth and eliminate any lingering musty odors. Here is how to go about it:
- Mix a solution of one part white vinegar and three parts water in a spray bottle.
- Spray the solution generously over the entire mat, ensuring it’s evenly coated.
- Allow the vinegar solution to air dry completely.
Alternatively, you can use a commercial disinfectant specifically designed for yoga mats or follow the manufacturer’s recommended cleaning instructions.
Also, proper drying is crucial to prevent mold from returning.
After cleaning and disinfecting, hang the mat in a well-ventilated area or place it in direct sunlight to ensure it dries completely.
Avoid rolling or storing the mat until it’s completely dry, as residual moisture can lead to mold regrowth.
Preventing Future Mold Growth on Yoga Mats
While removing mold from yoga mats is essential, preventing its growth in the first place is even better.
Here are some tips to keep your yoga mat mold-free even in years to come:
1. Clean and dry your mat after every use: Sweat and moisture can quickly lead to mold growth, so make it a habit to clean and dry your mat thoroughly after each yoga session.
2. Store the mat properly: Roll or hang your mat in a dry, well-ventilated area when not in use. Avoid storing it in damp or humid environments like basements or closets.
3. Replace your mat regularly: Over time, even with proper care, yoga mats can develop cracks or wear, providing ideal conditions for mold growth. Consider replacing your mat every 6-12 months, depending on usage and material.
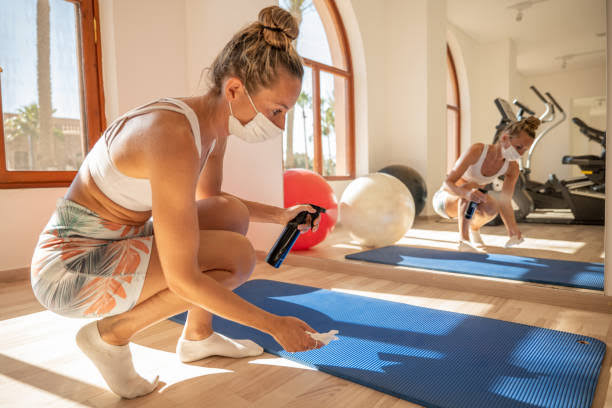
4. Use a mat cleaner or spray: Invest in a high-quality mat cleaner or disinfectant spray specifically designed for yoga mats. These products can help prevent mold growth and maintain a fresh, hygienic practice surface.
5. Expose your mat to sunlight: Occasionally, place your mat in direct sunlight, as the UV rays from the sun can help kill mold spores and bacteria.
By following these preventive measures and addressing mold growth promptly, you can ensure a clean, safe, and enjoyable yoga practice for years to come.
However, if you have a severe mold problem or are concerned about mold allergies, it’s best to consult a professional cleaning service. They will have the tools and expertise to safely and effectively remove mold from your mat.
Conclusion
Removing mold from yoga mats is an essential task for maintaining a healthy and hygienic practice environment.
By following the steps outlined in this guide, you can effectively eliminate mold stains and prevent future growth.
Remember to prioritize safety by wearing protective gear, ventilating the area, and taking precautions when dealing with mold.
With regular cleaning, proper storage, and preventive measures, you can keep your yoga mat fresh, clean, and ready for your next rejuvenating yoga session.
FAQs on How to Remove Mold from Yoga Mat
1. What causes mold growth on yoga mats?
Mold growth on yoga mats is usually caused by excess moisture and lack of proper drying after use. Sweat, humidity, and not allowing the mat to fully dry after cleaning can create a conducive environment for mold spores to thrive.
2. Is it safe to use a moldy yoga mat?
No, it is not recommended to use a yoga mat with visible mold growth. Mold can cause various health issues, including respiratory problems, allergic reactions, and skin irritations.
3. What is the most effective way to remove mold from yoga mats?
There are several effective methods for removing mold from yoga mats, including using a vinegar solution, hydrogen peroxide, or baking soda and essential oil paste.
4. Can I use bleach to remove mold from my yoga mat?
While bleach is an effective disinfectant, it is generally not recommended for cleaning yoga mats. Bleach can break down the materials used in yoga mats, causing discoloration, degradation, and potentially releasing harmful chemicals.
5. How can I prevent mold growth on my yoga mat in the future?
To prevent future mold growth on your yoga mat, it’s crucial to practice good hygiene and maintenance habits. Always clean and fully dry your mat after each use, and store it in a dry, well-ventilated area.
