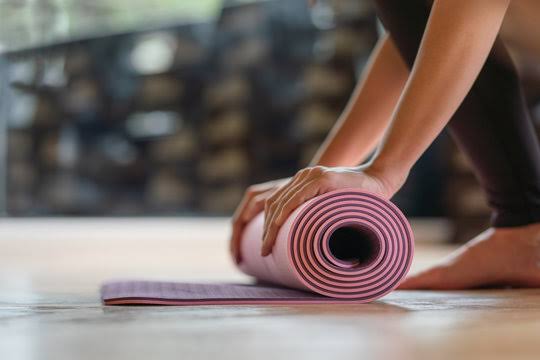
Do you know how to fix a torn Yoga Mat? Well you might see it as nothing but the sacred bond between a yogi and their mat is one forged through countless hours of practice, self-discovery, and inner exploration.
Imagine you’re in the middle of a peaceful yoga session, flowing effortlessly from one pose to the next, when suddenly you feel a snag beneath your feet.
Your heart sinks as you realize your beloved yoga mat has a tear. Most of the time, we ignore these simple and seemingly unimportant things that are amazingly important in our lives.

Consequently, yogis consider yoga mats as part of their bodies, thus being sacred items.
Nonetheless, time and frequent physical usage have adverse effects on them including tear and wear since they also have finite lifespan.
However, you don’t need to worry because there is a simple and cost-effective solution to breathe new life into your trusty companion.
By learning how to fix a torn yoga mat, you can not only save money on buying a new one but also deepen your connection with your practice.
In this article, we will delve into the intricate process of mending your yoga mat with care and precision. Keep reading!
Assessing the Damage of the Yoga Mat
Before you begin the fixing, it’s crucial to check the extent of the damage to your yoga mat.
Carefully inspect the tear or puncture and identify its type and severity.
Small cuts or punctures may be relatively straightforward to mend, while larger rips or tears might require a more involved approach.
Determining whether the mat is worth repairing is also an important consideration.
If the damage is much, spanning a significant portion of the mat’s surface, or if the mat is already showing signs of excessive wear and tear, it might be more practical to get a new one.
However, for isolated tears or punctures, repairing the mat can be a cost-effective solution that prolongs its lifespan.
Materials Needed to Fix a Torn Yoga Mat
To successfully fix a torn yoga mat, you’ll need a few essential materials. If your mat came with a repair kit, that’s a great starting point.
However, if you don’t have one, don’t worry – you can easily gather the necessary supplies yourself.
First and foremost, you’ll need an adhesive or glue specifically designed for bonding rubber or similar materials.
Some specialized yoga mat adhesives are available, but a high-quality, flexible, and waterproof general-purpose adhesive can work just as well.
Avoid using basic school glues or adhesives that might become brittle or peel off over time.
You’ll also need a pair of sharp scissors or a kitchen knife to trim any frayed edges around the tear, ensuring a clean surface for the repair.
A clean cloth or paper towels is also needed for wiping away any dirt or debris from the area.
Finally, you’ll need something to apply pressure to the repaired area while the adhesive cures.
Heavy objects like books or weights can work, but clamps specifically designed for clamping materials together will provide the most even and consistent pressure.
Read More: Wrinkles Schminkles Reviews | Benefits, Products, Prices, How To Apply It
Preparation Steps Required to Fix a Torn Yoga Mat
Before you begin the repair process, it’s important to prepare the mat and the work area properly.
Start by thoroughly cleaning the area around the tear or puncture with a mild soap and water solution.
Remove any dirt, debris, or oils that could interfere with the adhesive’s bond.
If the tear has left frayed or uneven edges, use your sharp scissors or kitchen knife to carefully trim them, creating a clean, straight edge. This will help ensure a smooth and secure repair.
Some repair experts recommend roughening the surfaces around the tear with fine-grit sandpaper or a dedicated surface preparation tool.
This step can help the adhesive grip the mat material more effectively, resulting in a stronger and longer-lasting bond.
How to Fix a Torn Yoga Mat
Now it’s time to dive into the actual repair process. The specific method you’ll use will depend on the type and size of the tear or puncture you’re dealing with.
For small punctures or cuts:
1. Apply a generous amount of adhesive or glue directly to the edges of the puncture or cut.
2. Carefully press the edges together, ensuring they are aligned and in full contact.
3. Use clamps or heavy objects to apply firm, even pressure to the area, allowing the adhesive to set and cure properly.
For larger rips or tears:
1. Cut a patch from a spare yoga mat or a similar material, ensuring it’s slightly larger than the tear itself.
2. Apply a thin, even layer of adhesive or glue to both the torn area of the mat and the underside of the patch.
3. Carefully align the patch over the torn area, pressing down firmly to ensure full contact and adhesion.
4. Use clamps or heavy objects to apply consistent pressure over the entire patched area, allowing the adhesive to cure completely.
Regardless of the method of repair, it is important to follow the manufacturer’s instructions for the specific adhesive or glue you’re using.
Pay close attention to recommended drying times and conditions, as improper curing can compromise the strength and durability of the repair.
Drying and Curing
Once you’ve completed the repair and applied pressure to the area, it’s time to let the adhesive or glue do its magic.
The drying and curing process is crucial for ensuring a strong and long-lasting bond between the mat and the patch or repair material.
Most adhesives and glues will require a certain amount of time to fully cure and reach their maximum strength.
This can be from several hours to a day or more, depending on the specific product and environmental conditions.
During the drying and curing process, it’s essential to maintain consistent pressure on the repaired area.
This will help prevent the materials from shifting or separating, ensuring a seamless and secure bond.
Follow the manufacturer’s recommendations for drying times and conditions.
Some adhesives may require a specific temperature range or humidity level to cure properly.
Additionally, avoid using or moving the repaired mat until the adhesive has fully cured to prevent any potential damage or disruption to the bond.
Post-Repair Care and Maintenance
Now you have successfully fixed your torn yoga mat and given it a new lease on life. But it doesn’t end there.
Proper care and maintenance are essential for ensuring your fixed mat continues to serve you well for years to come.
After the adhesive has fully cured, it’s important to clean the repaired area thoroughly.
Use a mild soap and water solution to remove any excess adhesive or residue, taking care not to saturate the area excessively.
When it comes to storage, it’s best to keep your fixed mat rolled up or stored flat in a cool, dry place, away from direct sunlight or excessive heat.
Avoid folding or creasing the mat, as this could put unnecessary stress on the fixed area and potentially compromise the bond.
To further extend the lifespan of your fixed mat, consider using a yoga towel or mat cover during your practice.
This added layer of protection can help shield the mat from sweat, oils, and other substances that could degrade the material over time.
Remember, even after a successful repair, your yoga mat will still be subject to normal wear and tear.
Treat it with care and respect, and consider replacing it when it becomes excessively worn or damaged beyond reasonable repair.
When to Replace the Mat
While fixing a torn yoga mat can be a cost-effective and environmentally friendly solution, there may come a time when replacement is the more practical option.
Here are a few signs that it might be time to bid farewell to your trusty mat and buy a new one:
1. Extensive damage
If your mat has multiple large tears or punctures spanning significant portions of its surface, it may be beyond reasonable repair.
The integrity of the mat could be compromised, posing potential safety risks during your practice.
2. Excessive wear and tear
Even if there are no major tears or punctures, excessive wear and thinning of the mat material can make it less stable and comfortable to use.
If the mat is showing significant signs of age and deterioration, it might be time for a replacement.
3. Compromised grip
One of the most important functions of a yoga mat is to provide a non-slip surface for your practice.
If your repaired mat is no longer offering adequate grip, even after cleaning and proper care, it could be a safety hazard.
4. Unpleasant odors
Over time, sweat, oils, and other substances can seep into the mat material, leading to unpleasant odors that are difficult to remove.
If your mat has developed a persistent, unpleasant smell, it might be time to consider a replacement.
When deciding whether to repair or replace your yoga mat, it’s essential to consider factors such as the cost of a new mat, the extent of the damage, and your personal comfort and safety during your practice.
Ultimately, the decision should be based on what will provide you with the best possible yoga experience while minimizing environmental impact and waste.
Final Thoughts on How to Fix a Torn Yoga Mat
Fixing a torn yoga mat is not only a cost-effective solution but also an eco-friendly choice that reduces waste and extends the lifespan of a beloved accessory.
By following the steps outlined in this article, you can breathe new life into your trusty mat and continue your yoga with confidence and peace of mind.
Embrace the spirit of mindfulness and sustainability by taking the time to fix your yoga mat.
Not only will you save money and reduce waste, but you’ll also cultivate a deeper appreciation for the precious resources.
FAQs on How to Fix a Torn Yoga Mat
1. What kind of adhesive or glue should I use to repair my yoga mat?
It’s best to use a specialized yoga mat adhesive or a high-quality, flexible, and waterproof general-purpose adhesive designed for bonding rubber or similar materials. Avoid using basic school glues or adhesives that may become brittle or peel off over time.
2. Can I fix a large tear or rip in my yoga mat?
Yes, you can fix larger rips or tears by cutting a patch from a spare mat or similar material and adhering it to the torn area using the appropriate adhesive. This process requires a bit more preparation and care, but it can effectively mend significant damage.
3. How long does it take for the adhesive to cure and the repair to be complete?
The curing time can vary depending on the specific adhesive or glue you’re using, but most will require several hours to a day or more to fully cure and reach maximum strength.
4. Can I use my fixed yoga mat right away after applying the adhesive?
No, it’s important to avoid using or moving the fixed mat until the adhesive has fully cured. Using the mat prematurely could disrupt the bond and compromise the repair.